
Finally, I have some time to write this tutorial. I put together this tree last night so the photos are a little dark. Here we go.
What you will need:
A selection of 2.5 inch wide fabrics. Jelly rolls are excellent for this project.
A 25 inch x width of fabric (normally 42 inches) white fabric for background and the borders.
Starting from the bottom of the tree, cut:
1- 2.5 inch x 2.5 inch square (colourful dots on brown background)
1- 8.5 inch x 2.5 inch strip (red on teal)
1- 6.5 inch x 2.5 inch strip (colourful dots on white background)
1- 4.5 inch x 2.5 inch strip (red)
From the white, cut:
4- 4.5 inch x 2.5 inch strips
2- 3.5 inch x 2.5 inch strips
2- 5.5 inch x 2.5 inch strips
When you lay them out, it will look like this.

The next step is sewing the pieces together to create the rows.
Starting from the bottom of the tree, sew two of your 4.5 inch x 2.5 inch strips to the opposite sides of your 2.5 inch x 2.5 inch square piece. Use 0.25 (1/4) inch seam allowance, press the seams either open or towards the white or the coloured fabric. I normally press them towards the coloured fabric so that the seam fold doesn't show behind the white fabric. I don't know why I did the opposite this time. Must be a late night sewing thing!


This is the tree trunk
Have you noticed the upside down cutting mat?
Next one is the base of the tree.
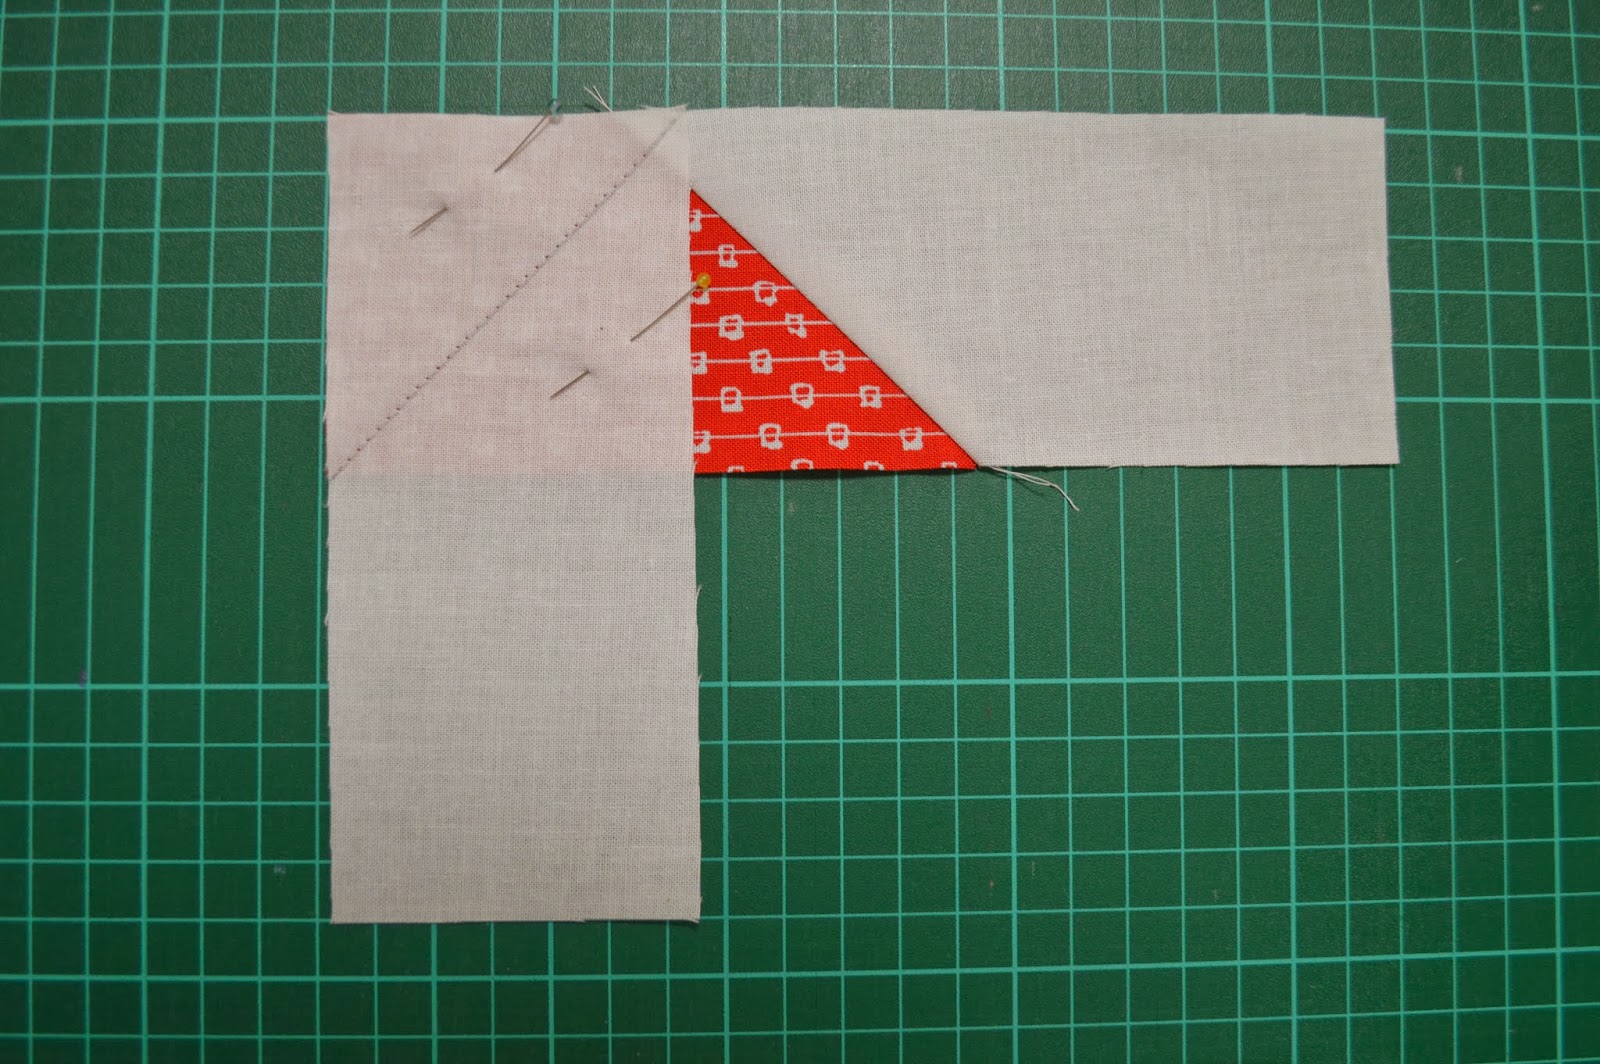
Take your 8.5 inch x 2.5 inch strip, lay it on your mat, place a 3.5 inch x 2.5 inch white strip on either side perpendicular to the 8.5 inch strip. Draw a 45-degree line from corner to corner. You can use a pencil or a disappearing ink pen.

The line will be from the top left corner to the bottom right corner when adding the white piece to the right.

And it will look like this

Now sew tiny bit to the right of the line. This will make the white piece and the coloured piece aligned when you press the white piece back. I think this is called a scant quarter stitch. Anyways, lets continue.

Now, measure about a 1/4 inch from the seam with your ruler and cut the excess off. Press the white pieces back. (I am sorry, I forgot to take a photo of this part but you will understand what I mean in the following photos.)
Repeat the exact same process for the other two rows; the middle and the top part of the tree. When sewing the top of the tree, first sew one white piece, cut the excess off, press it back, and then place and sew the other white piece like this:

So that you don't end up with this- which I did:


Now we will put together the rows.
Starting from the top of the tree, take your first row (the red triangle) and turn it down on to the second row (colourful dots on white).

Continue adding the rows by carefully centering each row with the one below. When your tree is formed, trim your block to have even edges or even trim it down to a size you want.
My finished block was 10.25 inch x 8.5 inch and I trimmed it down to 9.5 inch x 8.5 inch to be able to add borders and make it the size I wanted.
For the borders, I cut 2.5 inch strips from my white fabric which were at least 9 inch long and sewed them on to the 8.5 inch sides of my block. Pressed the seams back. I then sewed a 14 inch long strip to the 10.25 inch sides- I have been a little generous, just in case. Pressed the seams back. I then trimmed it down one more time to 10.5 inch x 10.5 inch and pressed it for a final, crisp look.
And there you go, a very cute Christmas tree!!

This is a great tutorial, thanks for sharing!
ReplyDeleteThanks a lot Christine!
Delete